This post is also available in:
 Français
It had been several months since I last touched my sewing machine. Thanks to JB putting pressure on me about a repair, I found the motivation to dust it off — and was reminded just how satisfying it is to finish a project. Having found nothing I liked in loungewear or lingerie during the winter sales, I decided to sew my own and invest the money I had planned to spend on lingerie into fabrics and sewing classes instead.
Kimono – class and pattern from Boudoir Français
I bought 4 classes from her (dresses, kimono, and a lingerie set). But I started with the kimono. The great thing is that Alison makes everything seem super simple. Watching the video, you don’t get a sense of the difficulty at all — which is incredibly motivating.
What I particularly dislike is having to print 24 pages to get the pattern. I’m used to printing everything in A0, or using a service that automatically assembles A4 sheets. Unfortunately, Boudoir Français patterns require you to tape the A4 sheets together manually, as there’s no way to have them printed in A0 (she doesn’t use standard pattern-making software for that). Not a dealbreaker, but definitely annoying.
The videos and tutorials are pleasant to watch, but it’s when I start taping the pattern pieces together and actually sewing that I run into difficulties — and that’s where the motivation takes a hit. In my opinion, the class is aimed at a false beginner, as there are many things left unsaid that an experienced sewer would figure out instantly, but that beginners like me won’t. For example, there are no notches on the pattern pieces. I assembled the collar incorrectly because neither the tutorial video nor the pattern give any indication that the collar needs to extend slightly beyond the front panel.
No interfacing is mentioned, not even for the collar. I wondered whether I should add some but I had run out of stock, so I ignored and skipped it. The kimono collar in the class isn’t a true kimono collar as I’ve seen in sewing books. I botched that too 😀
That said, I really appreciate the above-average attention to finishing (French seams), even if some details could have been even neater (the hem of the front panels, for instance).


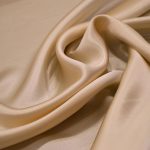
I should also mention that I unnecessarily increased the difficulty by choosing silk. Fortunately, I had the good idea to use tissue paper (Amazon link), because the fabric slides around a lot. I also broke 2 silk-specific needles. For the French seams on the sleeves, I couldn’t get the seam allowances to lie flat properly. In short, I’m not very proud of the finishing — but it is my first silk garment, so… What did bother me a bit was realising that the so-called “pure silk” I bought at So Tissus doesn’t appear to be pure silk at all. Of the two “silk” fabrics I bought, the burn test showed the first one isn’t silk. The second has way too much static electricity, which is suspicious. I think it’s silk but blended — probably 2% or 3% acetate, elastan or something like that, because the fabric clings to my skin as soon as I press it with an iron, whereas my other Vietnamese silk nightgowns don’t do that.
Materials (I make XS):
- 1.75 metres of blended silk, 1.35m wide: €35
- Interfacing
- Pattern and class: €31.20 (with a discount code)
Ruffled lingerie set – class and pattern from Boudoir Français
Next, I tried my hand at sewing lingerie. I had 1 metre of silk left, so I figured I might as well make a few pairs of underwear. The elastic and bra hardware were bought from Je Fais Mes Dessous.
This time, taping a few A4 sheets together wasn’t much of an issue since it goes quickly. However, same problem as before with Boudoir Français: oversimplified instructions. In her bralette and ruffled brief classes, several different types of elastic are used, but the explanations on how to stretch them correctly while sewing are insufficient. I actually learned more about choosing and applying elastic, and choosing lace, from a free YouTube video by Charlotte Jaubert. She does acknowledge in her “supplies and materials” video that a certain level of independence is required — but in that case, it’s no longer a beginner class, it’s a class for autonomous sewers. When a video class sends students elsewhere for tips and additional information, I don’t consider it beginner-friendly. I got more fabric guidance from a €7.50 pattern at Eclipse Lingerie Studio.


On top of that, these styles aren’t really practical in real life — the underwear shows through clothing because of the very visible elastic. But when you wear all three pieces together (kimono, bralette, brief), it makes a beautiful set, perfect for a luxurious me time at home — I love it! I also really appreciate not needing an overlocker at all, since I don’t own one and find them a nuisance.
These remain enjoyable sewing projects because the designs are simplified to the max to give you a motivational boost and work on your dexterity. I particularly liked the bralette (even though it’s the project I messed up the most) because in the class, she shows how to adjust the darts and elastic for each section. I think women who struggle to find lingerie that fits in shops will love this pattern, which allows for a great deal of freedom and personalisation. As for me, I ended up with a nearly custom-made bralette — and what a pleasure it is to wear lingerie that actually fits your measurements.
Materials (I make XS):
- 1 metre of silk, 1.35m wide: €20
- 8mm elastic, 10mm strap elastic, bra hook-and-eye: €5 from https://www.jefaismesdessous.com/ — what I love about Je Fais Mes Dessous is that when you choose a colour like “mango”, all their products match exactly, so no need to hunt for haberdashery that coordinates.
- Ribbon (for the little bows)
- Pattern & class: €53.12 for both (with a discount code)
In short, I don’t think I’ll be buying classes from Boudoir Français anymore. I love her aesthetic and she makes everything look effortless — which is incredibly motivating. But I don’t think I have the level, or the autonomy, needed to truly benefit from her classes.
And price-wise, I think I’d get more for my money by buying a book on lingerie sewing.
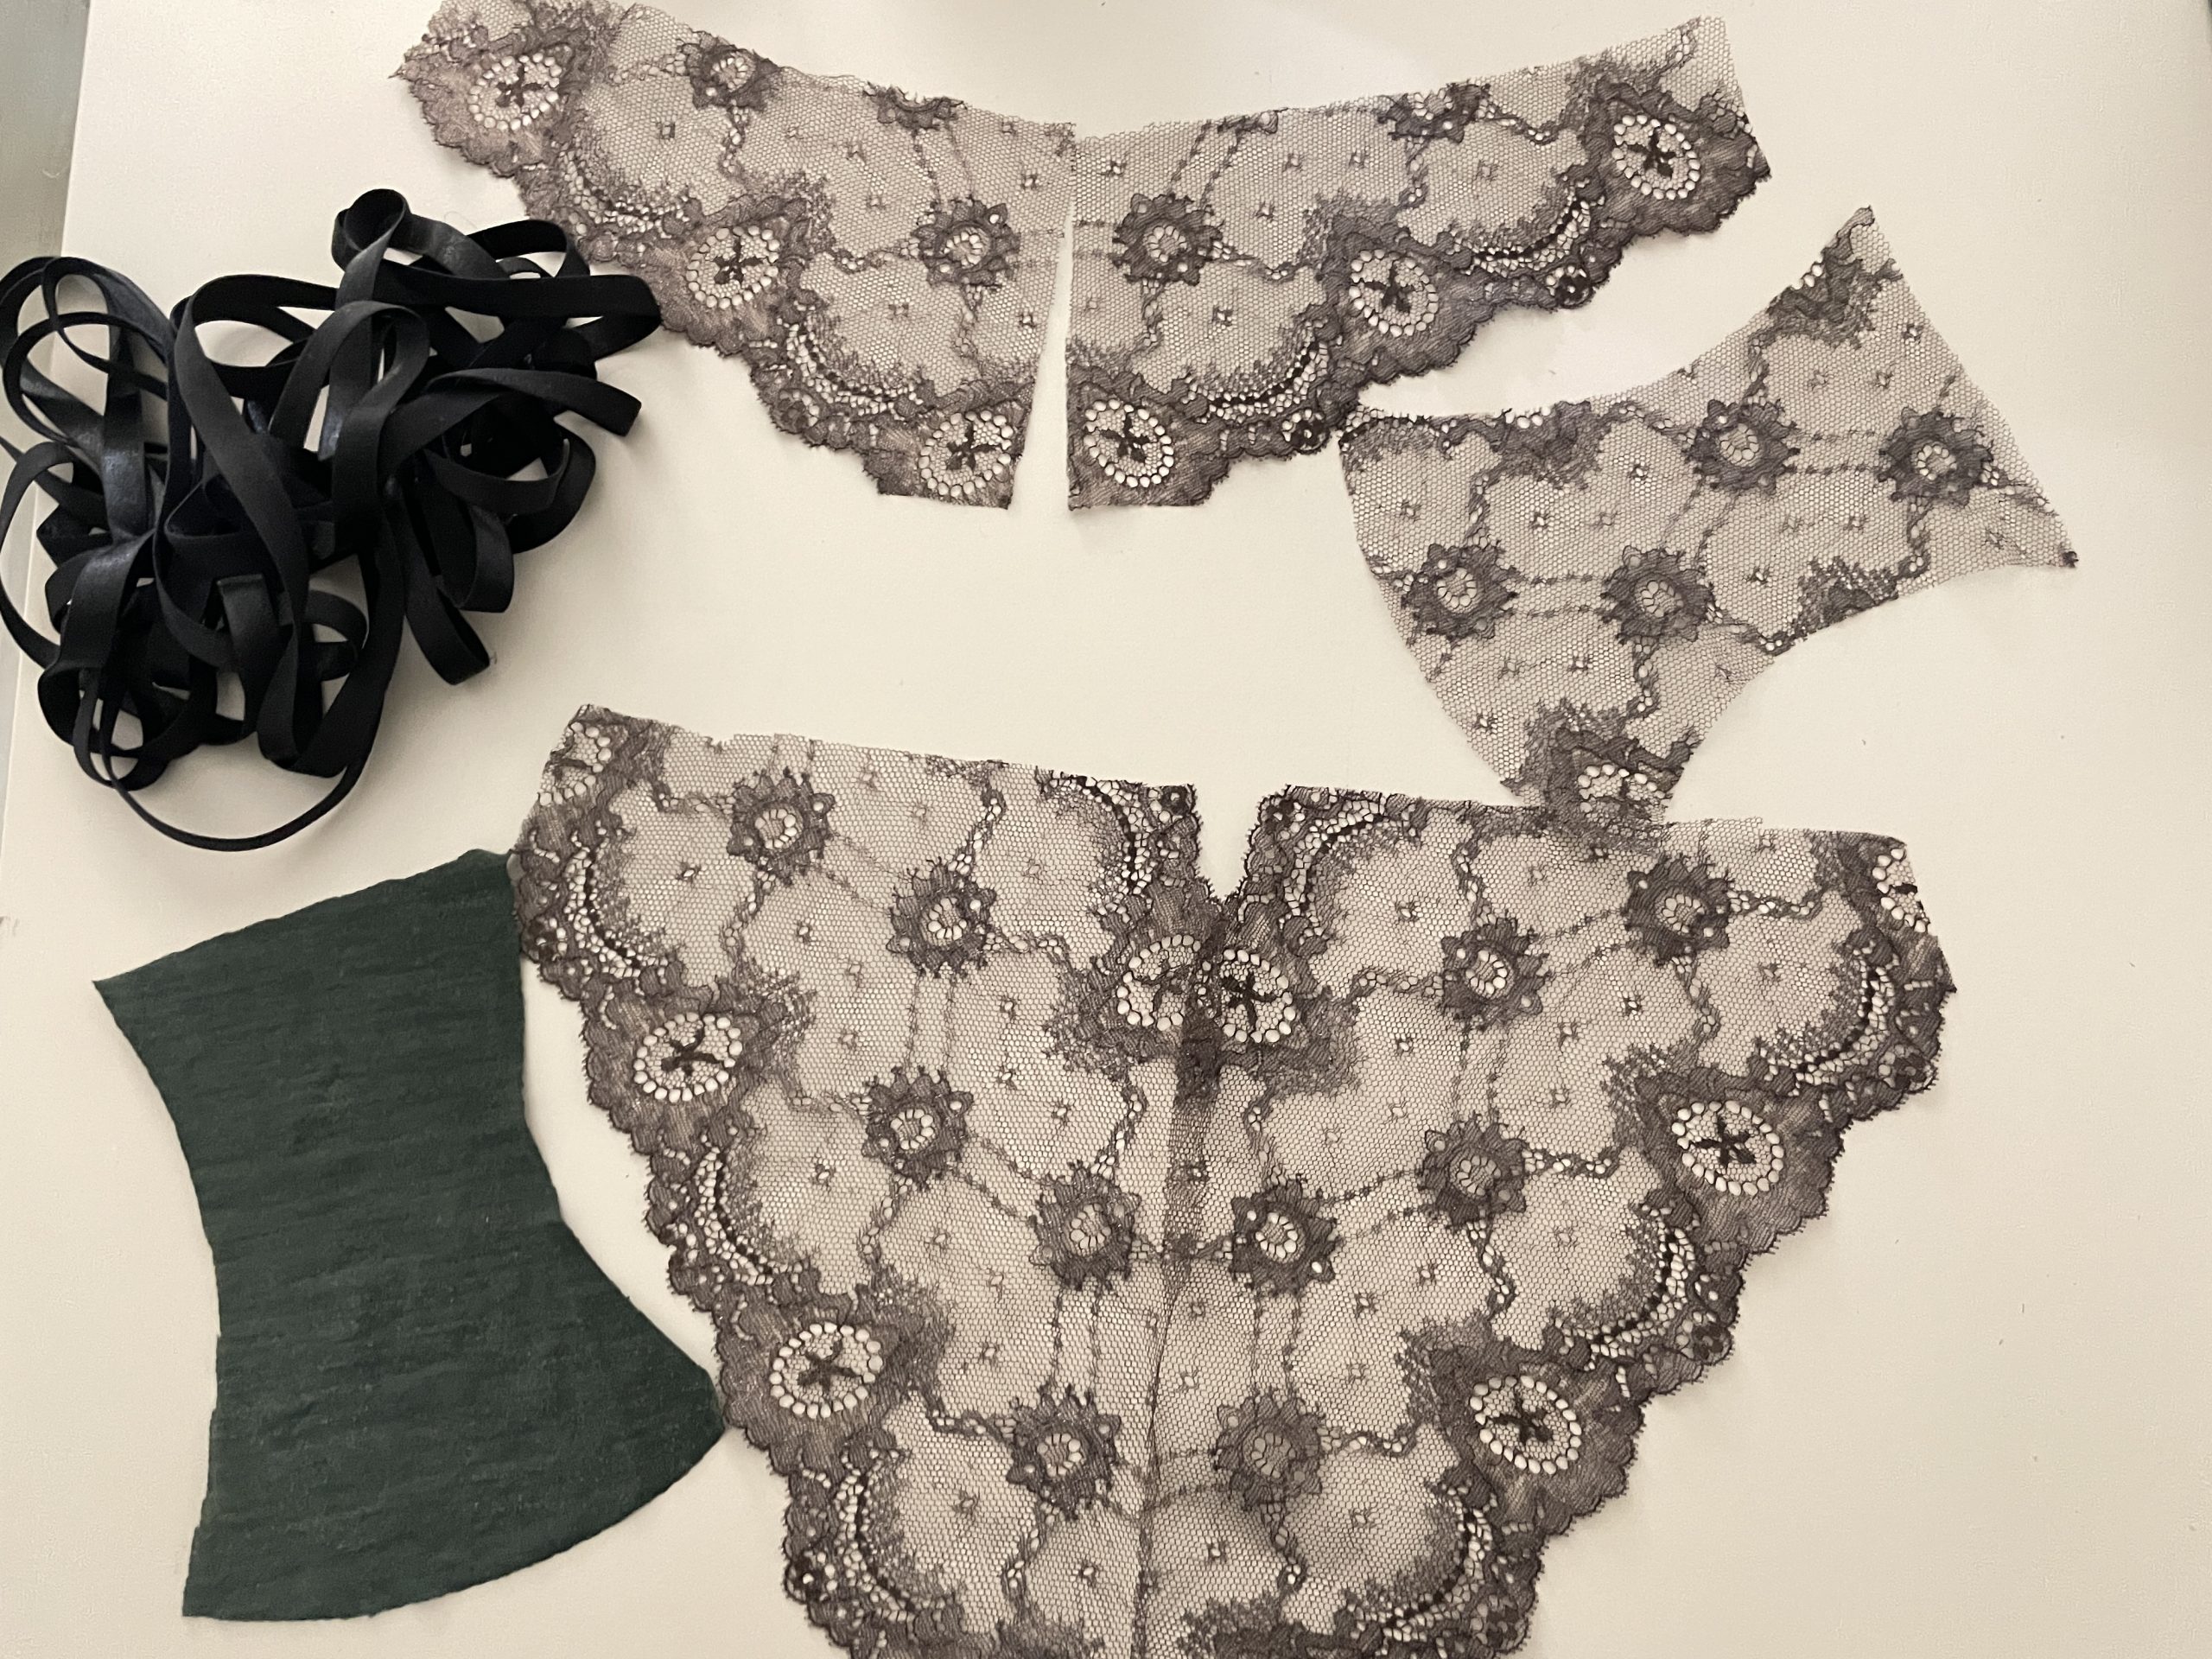
Orion lace brief – pattern from Eclipse Lingerie Studio
Finally, I sewed the Orion pattern (link). I was really surprised by the quality of the instructions — fabric selection guidance, where to buy, sewing tips and tricks. For €7.50, I honestly expected far less information. There’s no video class, but a generous soul had the great idea of filming a sewing vlog of this exact pattern. This design uses stretch lace and takes advantage of the lace’s finished edges for the sides, so very little elastic is needed. This means the brief sits pretty flat under clothing and is virtually invisible — it looks more professional, I find.
The Calais lace was bought on Vinted (€7 for 2.6m, enough for 2 XS briefs; then €4/m from another seller). The elastic came from Toto Tissus. The gusset was cut from an old merino wool T-shirt.


Materials and cost (per brief):
- Calais lace (16cm x 1.3m): €3.50
- Elastic: €1
Simple brief from Mon Atelier Lingerie
I used to buy and re-buy lace and silk briefs from Intimissimi, but always found the lace a bit cheap-looking.

When I saw that the book Mon Atelier Lingerie (Amazon link) offered a fairly similar style, I took the opportunity to treat myself to it. It really is the BIBLE of lingerie sewing. While it inspired me to try more challenging patterns, what I really wanted to sew first was the basic lace brief. What’s great about this book is that each pattern comes with several variations, so you’re free to mix things up with whatever fabrics you have on hand. I really love this version with a simple gusset — it looks very similar to my Intimissimi briefs. One word of warning: the patterns don’t include seam allowances. I wasn’t paying close enough attention and ended up with a brief that fits me exactly as-is, with zero room to spare — so be careful!


Elisa silk and lace brief from Je Fais Mes Dessous
When I came across the Elisa pattern (link), I thought the lace was stunning. The website doesn’t really do its patterns justice — I’d recommend checking out their Instagram to see them properly.
The pattern costs €7.50 (with instructions). I now have an almost uncountable number of Calais laces. But for the front panel, I only have a few small pieces of silk. Which one to choose? Fortunately, I thought of a bright red silk top I never wear. It’s too small to make 2 fully silk briefs, but if it’s just for the small front piece and the gusset, it’ll be enough for 3 Elisa briefs. The gusset is also in silk. I should have made the front panel as one single piece of silk, because it looks a bit odd having that little black lace section there. I’ll modify the pattern next time.

Shortening a size L silk robe
Once I’d decided I needed a floor-length silk robe, I debated between sewing one (which would mean buying an extra 3.6 metres of silk) or buying one on Vinted. I went with the second option. I found this brand-new, very affordable silk robe (€30) in size L and shortened it. It took me 1.5 hours in total.


In short, here are a few takeaways from these experiences:
- when buying from upcycled fabric sellers, always read the composition label carefully before purchasing
- I cut the silk very poorly with scissors — I’ll need to use many more pins next time (I recommend these ultra-fine pins)
- it’s very hard to find elastics in different widths that all match in colour — buying lingerie elastic kits from specialist haberdashers like Je Fais Mes Dessous is probably a good idea if you’re working with colours other than black or white
- the silk I chose for the kimono is probably around 16 momme — I think that’s far too lightweight for a beginner like me. Good thing I didn’t make a blouse with it, as it would have been completely sheer. For the kimono, I should have used a heavier silk satin.
- for the kimono, I should have made it a bit longer — at least long enough to cover my nightgowns. Ideally, floor-length, like this:

This post is also available in:
Français